


Mini Giraffe Tutorial
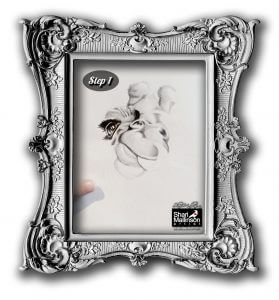
Step 1
Sketch out the outline of your giraffe. (Use various reference materials if required.) Start by lightly shading the individual areas to establish the areas that will be the darkest.
Tip: I use an H pencil for the lighter shading and for the final darker shadows I use a 5B to an 8B.
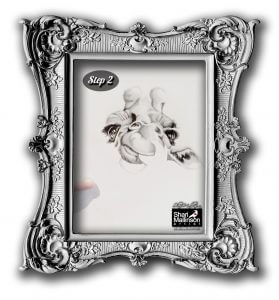
Step 2
Continue lightly shading each area. Layer and build on the lighter shading to create darker areas of shadow.
Tip: It’s best to start lighter as it’s easier to correct and/or erase than going head on into dark shading and not liking your result. (Believe me this can result in a lot of swearing, crumpling of paper and even tears. Ask my cats. I’m sure they could tell you stories.)
It’s also easier to bring the different areas together and have them look uniform if you start off with a lightly shaded base.
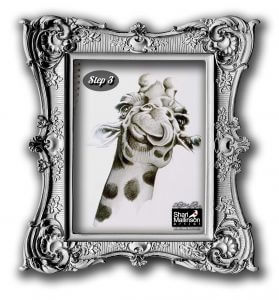
Step 3
Step back from your work and adjust anything that you don’t feel is working for you. Continue the shading process and add any additional line work. Use the same process as the shading for your line work. Start out light and work to a bolder line.
Tip: Not all your lines have to be bold. You can make part of a line bolder to indicate more shadow in that area and then leave the other part of the line lighter to indicate more light.
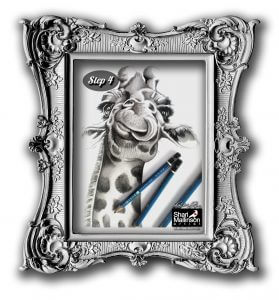
Step 4
Finish off any of the little details and sign your work!
Tip: You can also add a date to your work. Some artists just sign their work and keep a journal with all the additional details including descriptions of the work, size, medium, date, etc.

CUSTOMER SERVICE
FOLLOW SHARI